Making sure DNS records match the services and ingress endpoints in a Kubernetes cluster can get really complicated, especially when you have lots of application updates.
But there’s good news: ExternalDNS is here to help! A handy tool that automates DNS record management in Kubernetes, making things easier and more efficient.
The DNS Dilemma (My Dilemma):
I recently helped a client with migration to Kubernetes. The architecture of their application was such that each version deployed in our testing environment needed a dedicated set of configurations, including a unique CNAME. Normally, Kubernetes deployments rely on Services and Ingresses to expose web apps to the desired domain, but this also involves the annoying task of manually setting up DNS records for each version’s unique domain, making what should be an easy process into a big hassle.
Handling the DNS settings by hand was really tough. A new CNAME had to be created for every new application version and the DNS provider updated. As you can imagine, with the application complexity and the frequency of changes, this was no small feat.
Then came ExternalDNS, a tool that became our ray of hope. It automated the process of creating and updating DNS records in sync with our Kubernetes Services and Ingresses. With ExternalDNS, the moment we deployed a new application version with its corresponding service, it automatically configured the necessary DNS records. No more manual updates or hair-pulling when an external IP change requires a DNS update. ExternalDNS handled it all.
Enter ExternalDNS:
ExternalDNS is a progressive tool in the Kubernetes ecosystem, essential for automating the synchronization of DNS records with services and ingress endpoints in a Kubernetes cluster. It’s crafted by the Kubernetes SIG-Network team and is integral for simplifying the DNS management process, which is traditionally manual and handled by different operational teams.
Here’s a breakdown of what ExternalDNS brings to the table:
- Developer Empowerment: It directly shifts control over DNS records from IT teams to developers, aligning DNS changes with application deployment cycles.
- Automatic Synchronization: ExternalDNS ensures that any changes in your Kubernetes cluster, like launching a new version of an app, are automatically reflected in your DNS records, keeping them up-to-date without manual intervention.
- Bulk Record Management: It’s built to handle a vast number of DNS records, allowing for automation at scale.
- Enhanced Security and Simplification: By automating DNS record management, ExternalDNS reduces the risk of human error and potential security vulnerabilities. It streamlines the process, making it more secure and less prone to mistakes.
Why is ExternalDNS essential for Kubernetes?
It’s designed to be scalable and flexible, addressing the limitations of in-cluster DNS systems like Kube-DNS or CoreDNS, which can become performance bottlenecks as cluster sizes increase. With ExternalDNS, organizations can leverage robust DNS infrastructure outside of the Kubernetes environment to maintain high performance and reliability.
Flexibility and Choice:
- Open-Source and Commercial DNS Servers: ExternalDNS supports a wide range of DNS servers, from open-source options like SkyDNS to commercial services provided by cloud giants.
- Integration with Major Cloud Providers: ExternalDNS is compatible with DNS services from AWS (Amazon Route 53), Google Cloud (Google Cloud DNS), and Microsoft Azure (Azure DNS). It allows Kubernetes to update DNS records with these services dynamically.
Choosing the Right DNS Provider:
The selection of an external DNS provider typically depends on factors such as:
- Primary Cloud Environment: Your leading cloud provider will likely influence your choice of DNS service. For example, if your infrastructure is primarily on Azure, but you also use AWS and Google Cloud, Azure DNS might be your go-to for DNS management across all platforms.
- Technical Architecture: Specific technical needs might lead you to choose one DNS provider over another or even use a combination.
Notable Public Cloud DNS Services:
- Amazon Route 53: Offers geographic routing, traffic flow based on network conditions, and automatic syncing with Kubernetes.
- Google Cloud DNS: Known for its high availability and automatic management of Kubernetes DNS records.
- Azure DNS: Offers domain hosting with advanced security features like DNSSEC, supporting automated Kubernetes integrations.
Third-party DNS Providers:
- Cloudflare: Provides CDN and internet security services with benefits like DDoS protection and enhanced performance for Kubernetes service.
- Akamai: Delivers global load balancing and performance optimization for Kubernetes applications with its Intelligent Platform
- infoblox: Offers advanced DNS services with security features and traffic management capabilities suitable for Kubernetes integration.
Setting Up ExternalDNS with Cloudflare
Let’s assume you have a Kubernetes cluster up and running, and you want to set up ExternalDNS to manage DNS records for your services and ingresses using Cloudflare as the DNS provider.
Prerequisites:
- Kubernetes Cluster: You should have a Kubernetes cluster already set up and running.
- kubectl: Ensure that you have
kubectlinstalled and configured to interact with your Kubernetes cluster. - ExternalDNS: Install ExternalDNS in your cluster. You can follow the official installation guide here, or the configuration I will use.
- Cloudflare Account: You need a Cloudflare account and a domain.
Configuration:
- Cloudflare API Token: Create an API token in your Cloudflare account with appropriate permissions to manage DNS records. Make sure to note down the API token key.
- ExternalDNS Configuration:
Steps to Install ExternalDNS via Helm
Add Helm Repository: First, you must add the Helm repository containing the ExternalDNS chart. Use the following command:
helm repo add bitnami <https://charts.bitnami.com/bitnami>
helm repo update
- Install ExternalDNS: Next, install ExternalDNS using Helm. You’ll specify the Cloudflare provider and other necessary configurations through the Helm values. Use the following command:
helm upgrade --install external-dns bitnami/external-dns \\\\
--namespace external-dns --create-namespace \\\\
--set provider=cloudflare \\\\
--set sources[0]=service \\\\
--set sources[1]=ingress \\\\
--set domainFilters[0]=ez-test.uk \\\\
--set cloudflare.secretName=external-dns \\\\
--set policy=sync
2. This will install ExternalDNS in the external-dns namespace and configures it to use Cloudflare as the DNS provider. It also sets the domain filter to ez-test.uk and specifies the secret name for Cloudflare credentials.
Create Cloudflare API Token Secret (Securely): For enhanced security, consider using more secure methods to store your Kubernetes secrets:
kubectl create secret generic external-dns --from-literal=cloudflare_api_token=YOUR_API_TOKEN --namespace external-dns
(This command creates a secret named external-dns in the external-dns namespace, which ExternalDNS will use to authenticate with Cloudflare)
3. Verify Installation: After installing ExternalDNS, you can verify that it’s running correctly by checking the pods in the external-dns namespace.
kubectl get pods --namespace external-dns
4. Monitor Logs: Optionally, you can monitor the logs of ExternalDNS to ensure it’s functioning as expected.
kubectl logs -f -l app.kubernetes.io/name=external-dns --namespace external-dns
5. By following these steps, you should have ExternalDNS set up in your Kubernetes cluster, configured to manage DNS records for your services and ingresses using Cloudflare.
Implementing ExternalDNS with Cloudflare in Kubernetes: A practical Nginx example
To use the ExternalDNS setup with Cloudflare in your Kubernetes cluster, we will deploy a sample Nginx application and expose it through an Ingress. This will demonstrate how ExternalDNS automatically creates DNS records in Cloudflare for your Kubernetes services.
Deploy Nginx Application: First, create a deployment for Nginx. This deployment will run the Nginx server in your cluster.
apiVersion: apps/v1
kind: Deployment
metadata:
name: nginx-deployment
labels:
app: nginx
spec:
replicas: 2
selector:
matchLabels:
app: nginx
template:
metadata:
labels:
app: nginx
spec:
containers:
- name: nginx
image: nginx:latest
ports:
- containerPort: 80
- Apply this configuration using
kubectl apply -f nginx-deployment.yaml.Create a Service for Nginx: Next, create a service that exposes the Nginx deployment.
apiVersion: v1
kind: Service
metadata:
name: nginx-service
spec:
selector:
app: nginx
ports:
- protocol: TCP
port: 80
targetPort: 80
2. Apply this configuration using kubectl apply -f nginx-service.yaml. Create an Ingress for Nginx: Finally, create an Ingress resource. This Ingress will route traffic from the internet to your Nginx service.
apiVersion: networking.k8s.io/v1
kind: Ingress
metadata:
name: nginx-ingress
annotations:
nginx.ingress.kubernetes.io/ssl-redirect: "true"
spec:
ingressClassName: nginx
rules:
- host: example-dns.ez-test.uk
http:
paths:
- path: /
pathType: Prefix
backend:
service:
name: nginx-service
port:
number: 80
3. Apply this configuration using kubectl apply -f nginx-ingress.yaml.
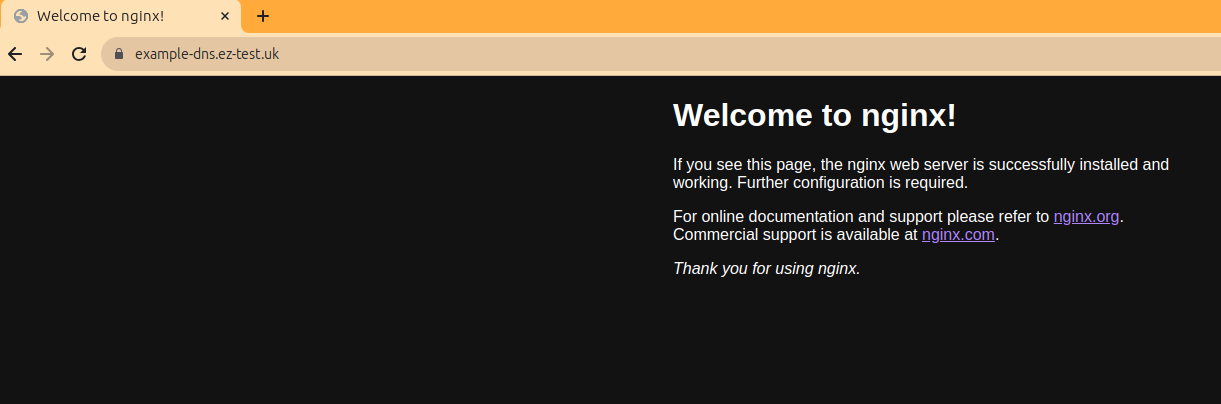
Once these resources are deployed in your Kubernetes cluster, ExternalDNS will interact with Cloudflare to automatically create DNS records for example-dns.ez-test.uk, pointing to your Nginx service.
The logs show that ExternalDNS dynamically created a DNS record for the specified ingress. This is a crucial feature, as it automates the process of DNS record management in response to changes within the Kubernetes cluster.
This demonstrates the successful integration of ExternalDNS with Cloudflare, ensuring that DNS records are correctly managed in your DNS provider:

Now we will be accessing example-dns.ez-test.uk, we can verify that the ingress is correctly configured and the DNS record is functioning as needed. We confirmed that the external traffic is correctly routed to our Kubernetes services:
When we delete the ingress resource (using kubectl delete -f nginx-ingress.yaml), ExternalDNS responds by removing the corresponding DNS record from Cloudflare.We can see in the logs from ExternalDNS:
Cloudflare confirms that the DNS record has been removed, illustrating ExternalDNS’s capability to manage DNS records dynamically, including cleaning up when resources are deleted:
In summary, this process demonstrates the effectiveness of ExternalDNS in managing DNS records for Kubernetes services and ingresses. It highlights the tool’s ability to dynamically create and delete DNS records in response to changes in Kubernetes resources, ensuring seamless DNS management for your applications.
Limitations of Using ExternalDNS in Kubernetes
While ExternalDNS offers significant advantages in managing DNS records for Kubernetes, it’s important to be aware of its limitations. Understanding these drawbacks is crucial for making an informed decision about whether ExternalDNS is the right fit for your Kubernetes environment.
Additional Complexity
Integrating ExternalDNS adds a layer of complexity to your Kubernetes setup. It requires configuring an external DNS server, which can be a challenging task, especially for teams with limited experience in DNS management.
Increased Costs
External DNS services typically incur higher costs compared to managing DNS locally. While this might be manageable for smaller deployments, it can significantly impact the budget for larger projects with numerous domains.
Latency Issues
Using external DNS servers can introduce additional latency. DNS resolution requests need to travel over the network to the external server, potentially affecting application performance and user experience.
Lack of Kubernetes-Specific Control
ExternalDNS, despite its advantages, might not offer the fine-grained control needed in certain scenarios. This includes:
- Namespace-level control: ExternalDNS automatically manages DNS records for all Services and Ingress resources across all namespaces, which might not be desirable in all cases.
- Record type control: By default, ExternalDNS creates A records. If you need other types of records like CNAME or TXT, additional manual configuration is required.
- Custom domain configuration: ExternalDNS uses a default domain configuration. For custom domain names or advanced DNS settings, manual setup is necessary.
Conclusion
ExternalDNS makes handling DNS in Kubernetes easier, offering better scalability and reliability. It’s great for big or complex Kubernetes setups, as it outweighs the extra steps and costs involved.
This tool works quietly in the background, turning your Kubernetes cluster into a central place for managing domains. You won’t need to manually update DNS records anymore, saving much effort and time.
Its real value shines when you use it with Continuous Delivery systems to quickly set up various testing environments. This makes things run smoother and keeps your DNS settings up-to-date with every new deployment.
Choosing ExternalDNS depends on what your project needs. It’s about balancing the challenges against the big benefits it brings in automating and managing DNS records in Kubernetes.