
Why Teams Are Moving AI Workloads to Jetson — And How to Start (Part 1)
Want to run powerful AI apps on edge devices like Jetson — and still test and scale them from your PC or the cloud? This guide breaks down what you need to know about architecture, drivers, and cross-platform Docker workflows so you can build once and run anywhere.
Running AI workloads across Jetson and the cloud can be a logistical challenge. Different architectures, toolkits, and environments make consistency hard. If you are DevOps engineers, developers, and ML/AI practitioners who want to learn about GPU-accelerated Docker workloads on NVIDIA Jetson (ARM64) and PC (x86_64) using Docker, CUDA, and the NVIDIA container runtime, while supporting cross-platform builds using Docker Buildx, this article will help you cut through the noise.
Your DevOps Map to Jetson and Beyond:
- What is NVIDIA Jetson?
The uses and the advantages of using NVIDIA Jetson hardware in the industry - What is JetPack and what is it used for?
- What is the difference between AMD64 and ARM64?
- Why Migrate the Hardware to the Cloud?
- Understanding Drivers & CUDA Toolkit
- What are ‘nvidia-smi’ and ‘nvcc’ commands? What’s the difference between them?
- What is the NVIDIA container runtime?
- Understanding Dockerfile Cross-Platform & Buildx
- What is QEMU and Why Use It?
- The ways to access Jetson from your PC, and the easiest one
- How to Share Internet from Your PC to Jetson Orin (via Ethernet)?
- Summary: Key Concepts for Working with NVIDIA Jetson, CUDA, and Cross-Platform Containers
What is NVIDIA Jetson?
NVIDIA Jetson is an edge AI platform powered by ARM CPUs and embedded NVIDIA GPUs. Popular models include Jetson Nano, Xavier NX, and Orin.
In this article, we focus on the NVIDIA Jetson Orin type.
Jetson Orin is a powerful edge AI computing module that combines an ARM64 CPU with an integrated NVIDIA GPU, designed for running high-performance AI, robotics, and computer vision applications on embedded systems.
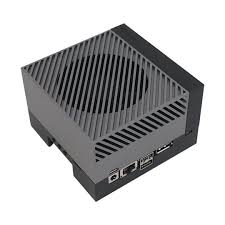
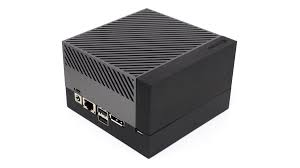
Source:The Cube of AI Power
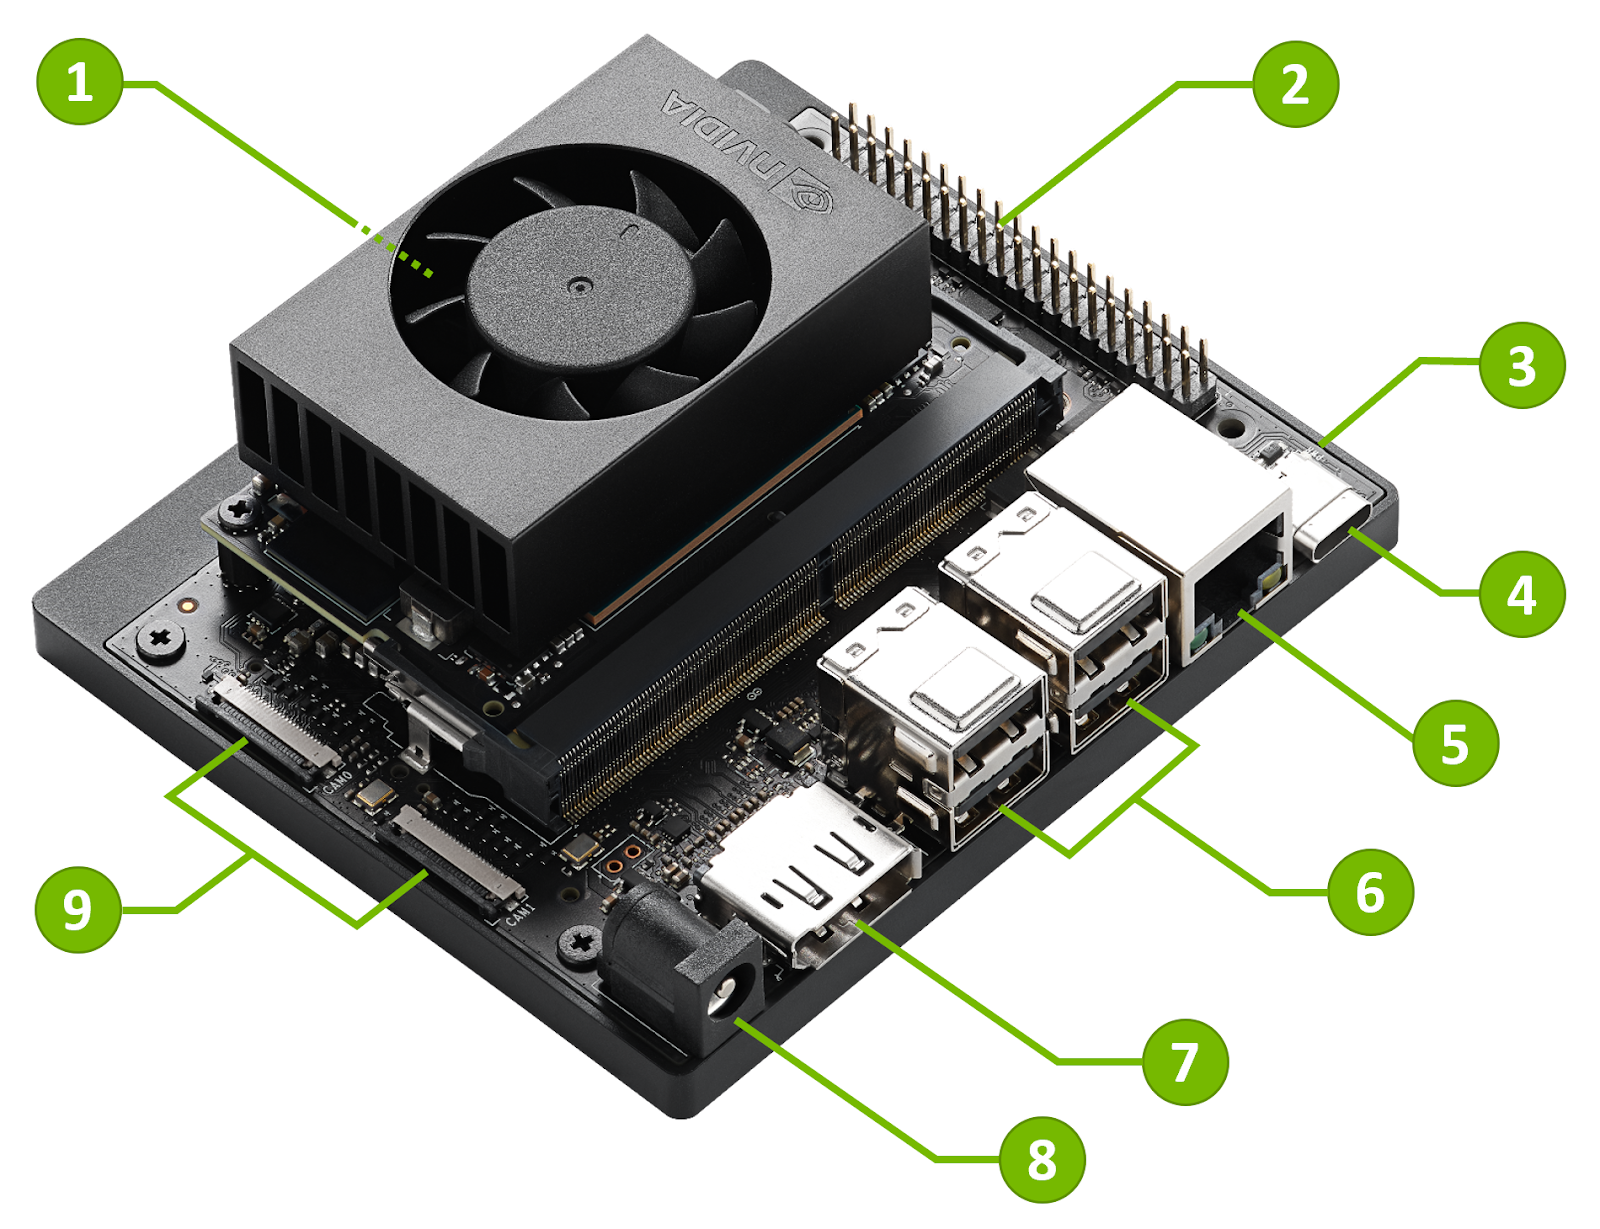
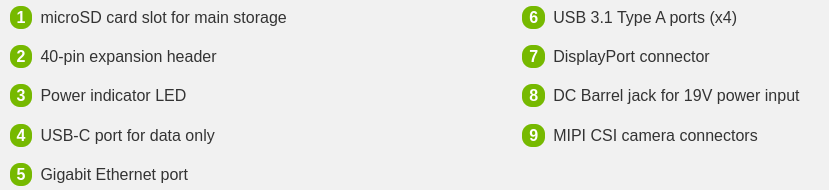
Source:Jetson Orin Nano Developer Kit Getting Started Guide
Jetson Orin is unique for its significantly higher AI performance, newer Ampere GPU architecture, faster CPUs, and advanced I/O capabilities, making it ideal for heavy-duty edge AI tasks compared to earlier Jetson models.
For more unique features, you can take a look at the table below:
| Feature | Jetson Orin Series | Other Jetson Models (e.g., Xavier, Nano) |
| Performance | Up to 275 TOPS AI compute | Xavier NX: ~21 TOPS, Nano: ~0.5 TOPS |
| GPU | Ampere architecture (same as RTX 30 series) | Volta (Xavier), Maxwell (Nano) |
| CPU | 12-core ARM Cortex-A78AE | Xavier: 8-core Carmel, Nano: 4-core Cortex-A57 |
| Memory | Up to 64 GB LPDDR5 | Nano: 4 GB, Xavier NX: 8 GB LPDDR4x |
| Interfaces | More PCIe lanes, high-speed I/O, multiple CSI | Fewer lanes, less bandwidth |
| Form Factors | Orin Nano, Orin NX, Orin AGX (different sizes) | Nano, Xavier NX, Xavier AGX |
| Power Efficiency | Better performance per watt | Less efficient at same workload |
| JetPack Support | Supports latest JetPack versions (e.g., 6.x) | Older models may be limited to JetPack 4.x/5.x |
The uses and the advantages of using NVIDIA Jetson hardware in the industry:
Companies across a wide range of industries use NVIDIA Jetson Orin for deploying advanced AI at the edge, where real-time performance, energy efficiency, and compact size are critical.
In the automotive industry, manufacturers and suppliers use Jetson Orin for in-vehicle computing, advanced driver-assistance systems (ADAS), and driver monitoring solutions that require processing multiple camera and sensor streams with low latency.
In robotics, both industrial and service robots rely on Orin’s GPU power to perform simultaneous localization and mapping (SLAM), object detection, and path planning—companies like ABB and JD Logistics use it in smart factory robots and delivery automation.
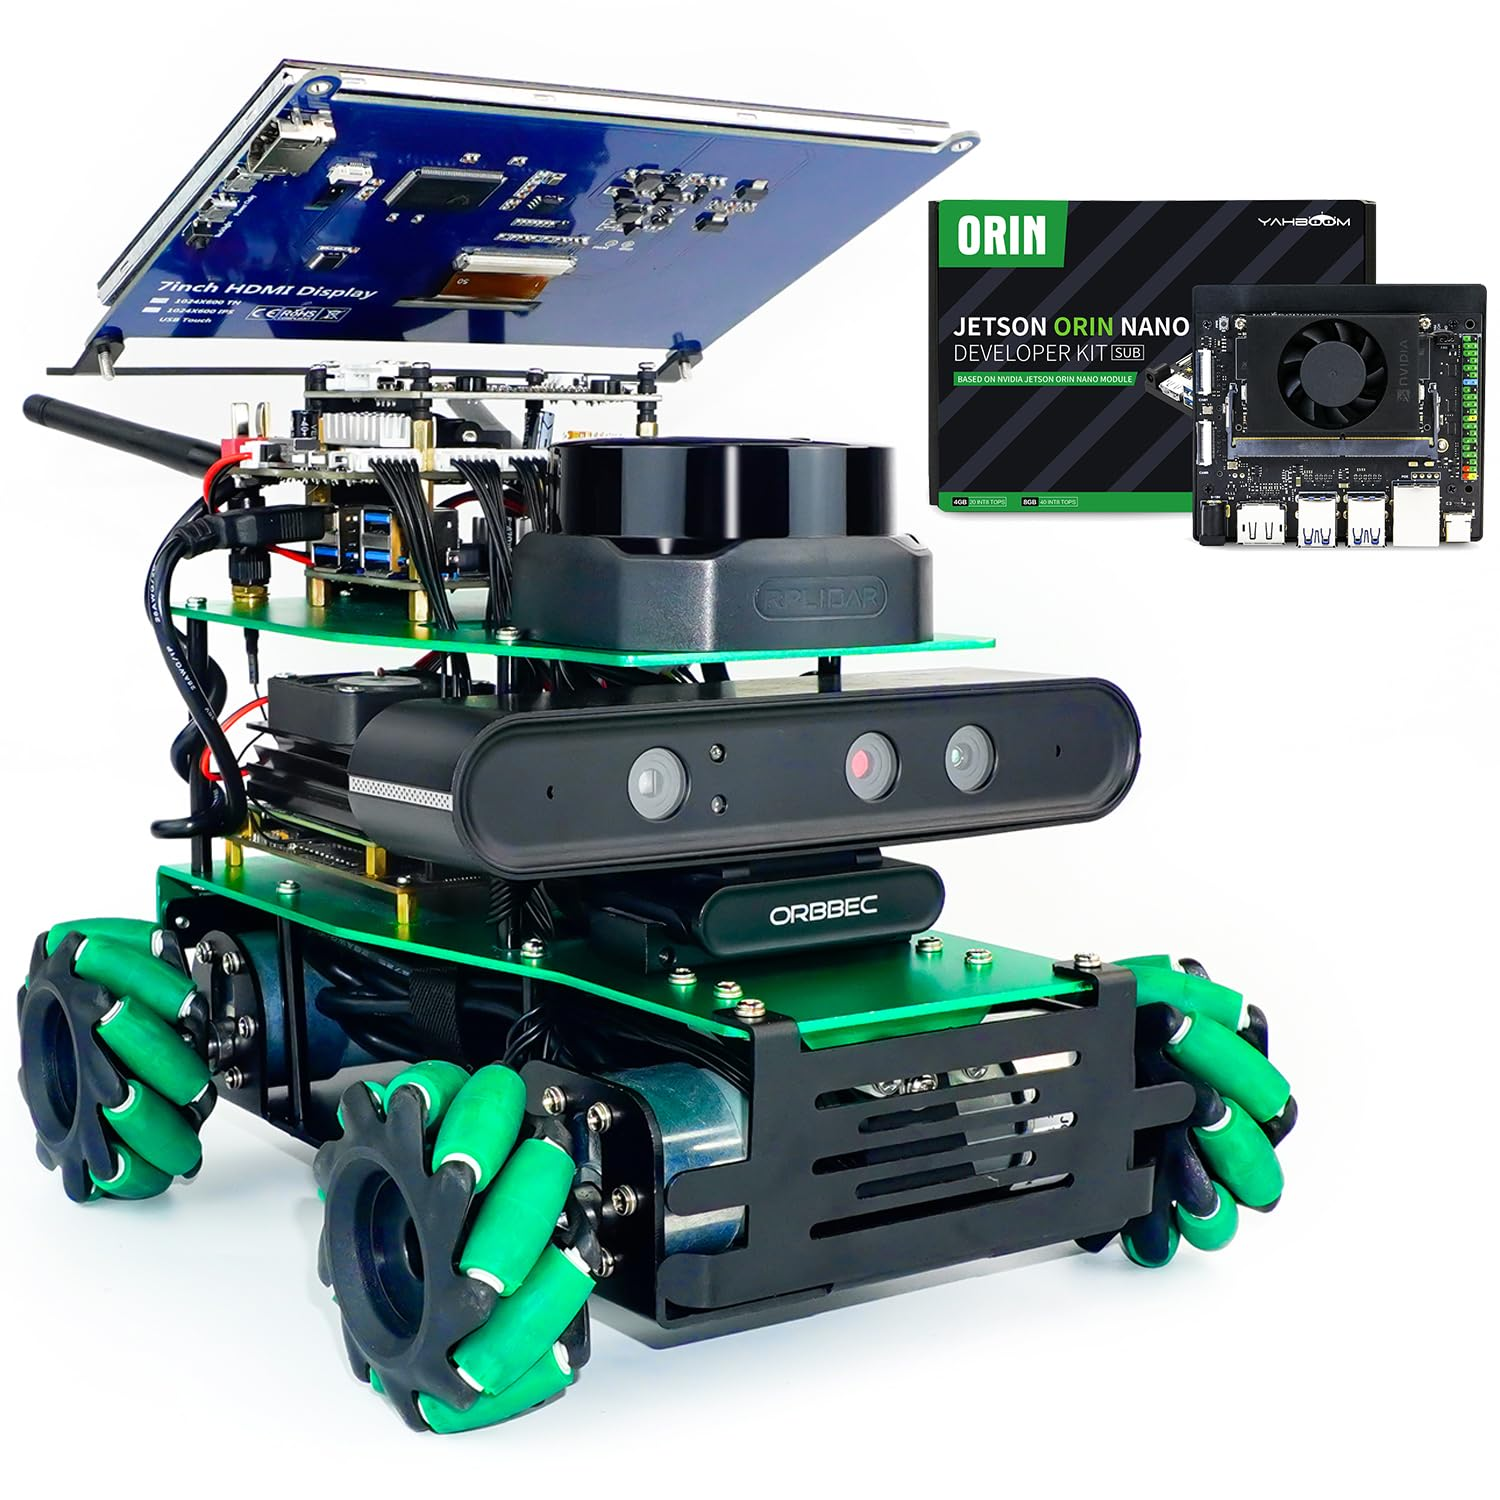

Smart Robots with NVIDIA Jetson AGX Orin
In smart cities, Orin is deployed in traffic management systems, license plate recognition, and AI surveillance, enabling cameras to analyze video feeds on-device rather than sending data to the cloud.
In the retail and AIoT sectors, businesses leverage Jetson Orin for smart checkout systems, customer behavior tracking, and inventory monitoring, where high-throughput edge inference reduces reliance on back-end servers.
Healthcare companies such as Subtle Medical use Orin for AI-assisted imaging and diagnostics, allowing powerful inference inside portable medical devices.
In manufacturing, Jetson Orin powers visual inspection tools for detecting defects on production lines in real time, and in agriculture, companies like John Deere integrate Orin into autonomous tractors and drones for tasks like crop classification and weed detection.
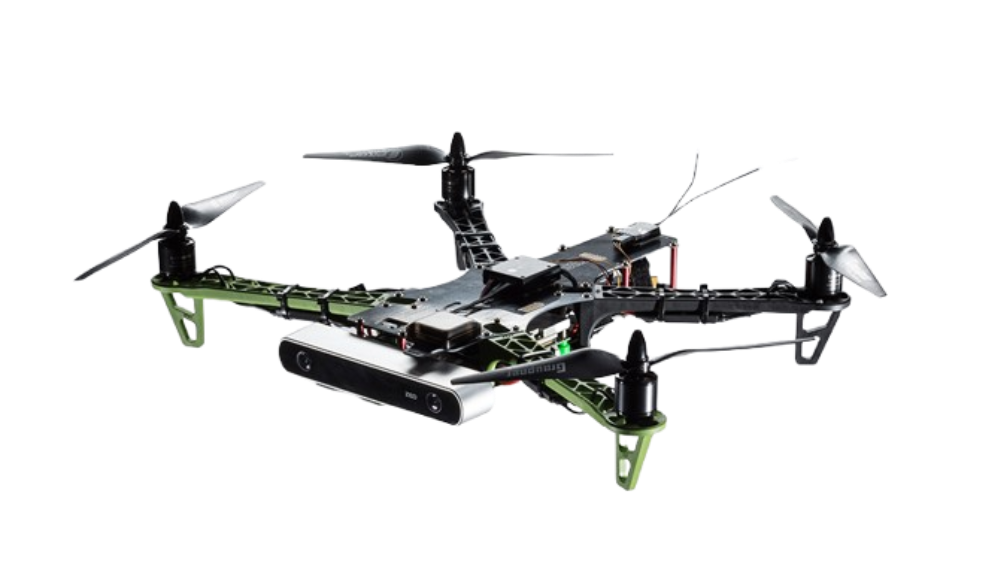
Even in the aerospace and defense industries, Orin is used in rugged, autonomous platforms like drones for reconnaissance and environmental monitoring in remote areas.
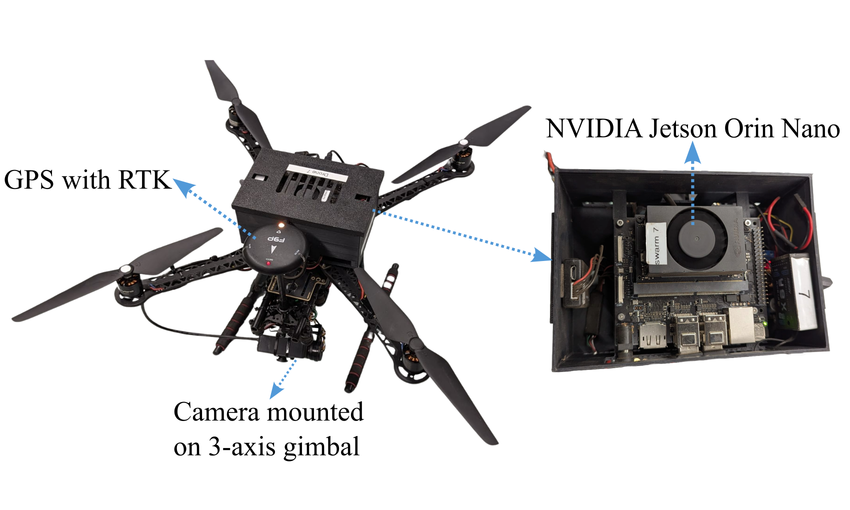
Source: Drone hardware configuration
Source: Jetson Quick Start Platforms
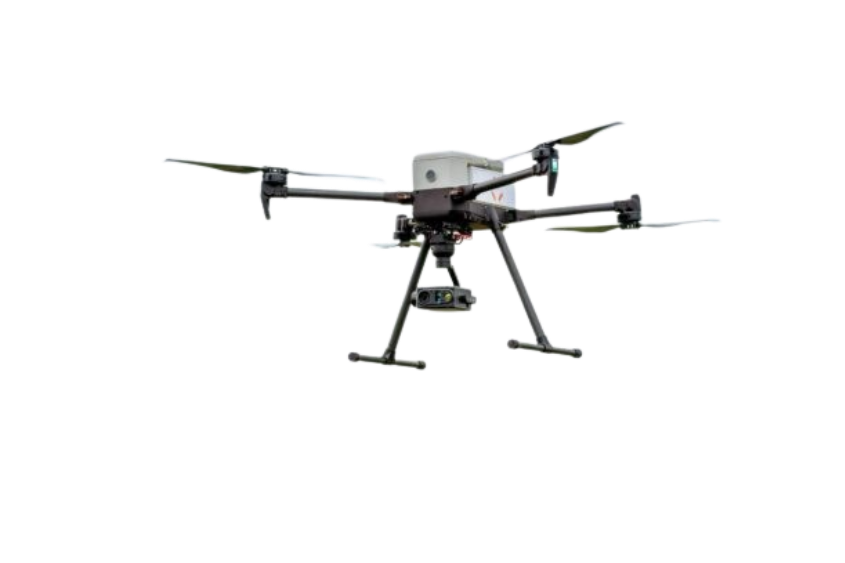
Drones with NVIDIA Jetson NANO and NX
Ultimately, Jetson Orin is chosen by companies that need to run complex AI models, such as deep learning, computer vision, and sensor fusion, right at the edge, without relying on cloud connectivity. Its compact form factor, powerful Ampere GPU, ARM64 architecture, and support for NVIDIA’s JetPack SDK make it an ideal platform for next-generation AI applications across diverse environments.
What is JetPack and what is it used for?
JetPack is NVIDIA’s software development kit (SDK) for Jetson devices that includes the Linux for Tegra (L4T) OS, GPU drivers, CUDA, cuDNN, TensorRT, and tools needed to develop and run AI, computer vision, and robotics applications on Jetson.
You can read more info here JetPack SDK | NVIDIA Developer
What is the difference between AMD64 and ARM64?
AMD64 is a 64-bit architecture used in Intel/AMD desktop and server CPUs (x86_64), while ARM64 is a 64-bit architecture designed for power-efficient ARM processors used in mobile, embedded, and edge devices like Jetson.
For more information, you can take a look at the table below:
| Feature | AMD64 (x86_64) | ARM64 (aarch64) |
| Architecture | CISC (Complex Instruction Set) | RISC (Reduced Instruction Set) |
| Instruction Set | Intel/AMD x86_64 | ARMv8-A (64-bit) |
| CPU Vendors | Intel, AMD | ARM Ltd. (used by Apple, NVIDIA Jetson) |
| Common Devices | Desktops, Laptops, Servers | Mobile, Edge devices, Jetson, Raspberry Pi |
| Power Efficiency | Lower | Higher (very efficient) |
| Performance | High clock speed, powerful cores | Optimized for multi-core & low power |
| Docker Arch | linux/amd64 | linux/arm64 |
Why Migrate the Hardware to Cloud?
Migrating your Jetson Orin or PC workloads to the Cloud allows you to scale, automate, and test your applications in the cloud, without relying on physical hardware. It’s ideal for running CI/CD pipelines, performing automated GPU builds or model training, or simulating Jetson-like environments using ARM64 EC2 instances. This gives developers flexibility, high availability, and the ability to spin up or tear down GPU-enabled environments on demand, especially when hard to access remotely.
It also eliminates dependency on physical hardware, which can introduce its own limitations, bottlenecks, and maintenance challenges.
Understanding Drivers & CUDA Toolkit
So, after we understand the architecture of Jetson Orin, let’s focus on CUDA, NVIDIA drivers, and the development toolkit, which are essential for enabling GPU-accelerated applications.
The NVIDIA driver is the low-level software that allows the operating system (like Linux for Tegra on Jetson or Ubuntu on PC) to communicate with the NVIDIA GPU. Without it, the GPU simply can’t be used by your applications.
Above the driver sits the CUDA Toolkit, which is a collection of development tools and libraries that allow developers to write and run high-performance code on the GPU. This includes the CUDA compiler (nvcc), math libraries (like cuBLAS and cuFFT), and runtime APIs that allow GPU functions to be called from C, C++, or Python code.
On Jetson devices, these components are bundled together in the JetPack SDK, which also includes other critical libraries like cuDNN (for deep learning), TensorRT (for fast inference), and OpenCV (for computer vision).
The toolkit provides everything needed to build, compile, and optimize AI applications that fully utilize the power of the GPU, while the driver ensures that software and hardware can communicate efficiently.
On Jetson, all of this is installed automatically through JetPack, but on x86 systems or cloud instances, the driver and toolkit usually need to be installed separately and matched to the appropriate CUDA version.
What are ‘nvidia-smi’ and ‘nvcc’ commands and
What’s the difference between them?
🔧 What is nvidia-smi command?
nvidia-smi (NVIDIA System Management Interface) is a command-line tool that shows real-time information about your GPU hardware, including:
- Installed driver version
- CUDA version supported by the driver
- GPU usage, temperature, memory usage
- Running GPU processes
Example:
$ nvidia-smiOutput highlights:
+---------------------------------------------------------------------------------------+
| NVIDIA-SMI 540.4.0              Driver Version: 540.4.0         CUDA Version: 12.6    |
|-----------------------------------------+----------------------+----------------------|
| GPU  Name        Persistence-M          | Bus-Id     Disp.A   | Volatile Uncorr. ECC |
| Fan  Temp  Perf  Pwr:Usage/Cap          | Memory-Usage        | GPU-Util  Compute M. |
|                                         |                     | MIG M.               |
|=========================================+======================+======================|
|   0  Orin (nvgpu)      N/A              |   N/A        N/A    | N/A                  |
| N/A   N/A    N/A   N/A / N/A            | Not Supported       | N/A       N/A        |
|                                         |                     |                      |
|                                         |                     | N/A                  |
+-----------------------------------------+----------------------+----------------------+
+---------------------------------------------------------------------------------------+
| Processes:                                                                              |
|  GPU   GI   CI   PID   Type   Process name                           GPU Memory Usage  |
|=======================================================================================|
|  No running processes found                                                            |
+---------------------------------------------------------------------------------------+
You can see from the output the driver version and the cuda version:
Driver Version: 540.4.0
CUDA Version: 12.6
This tells you:
- The NVIDIA driver version is installed.
- The maximum CUDA version that this driver officially supports: 12.6.
🔍 nvidia-smi reflects what your driver can support — even if no CUDA toolkit is installed.
🔧 What is nvcc?
nvcc (NVIDIA CUDA Compiler) is the compiler tool that comes with the CUDA Toolkit. It is used to compile CUDA code (.cu files) into binaries that run on the GPU.
Example:
$ nvcc --versionOutput example:
Cuda compilation tools, release 12.4, V12.4.91This tells you which CUDA Toolkit version is actually installed on your system: 12.4.
🔍 nvcc shows what you have installed locally, not necessarily what the driver supports.
What’s the Difference?
| Command | Tells you about… | Source |
| nvidia-smi | Driver version & max supported CUDA | From the driver |
| nvcc | Installed CUDA Toolkit version (compiler) | From the toolkit installation |
🧠 Why are both important?
- If your CUDA code isn’t compiling, check nvcc to make sure the correct toolkit version is installed.
- If your CUDA toolkit version is too new for your GPU driver, check nvidia-smi — you may need to upgrade your driver.
- If you’re using Docker images (e.g., nvidia/cuda:12.4.0-base), make sure the host driver version (nvidia-smi) supports the CUDA version inside the container.
What is the NVIDIA Container Runtime?
The NVIDIA Container Runtime is a special runtime that allows Docker (or other container engines) to access the GPU inside containers — meaning, it lets containers run code that uses CUDA, cuDNN, TensorRT, and other GPU-accelerated libraries.
🧠 Why do we need it?
By default, Docker containers are isolated from the host’s hardware, including GPUs. So if you try to run a CUDA app in a container, it won’t detect your GPU — unless you add GPU support explicitly.
That’s exactly what the NVIDIA Container Runtime does:
It acts as a bridge between Docker and your NVIDIA GPU driver, making GPU access inside containers seamless.
🔧 How it works:
- Replaces or extends the standard Docker runtime (like runc) with one that knows how to expose the GPU (nvidia runtime).
- Ensures that the required NVIDIA libraries and drivers from the host are available inside the container at runtime.
You can run the container with a GPU by running:
$ docker run --gpus all <your-container-image>Or with explicit runtime:
$ docker run --runtime=nvidia <your-container-image>You can add these variables to the docker run command:
*If you choose the first option (–gpus all) you can ignore the first variable.
-e NVIDIA_VISIBLE_DEVICES=all /
-e NVIDIA_DRIVER_CAPABILITIES=all- By default, no GPU is available unless explicitly assigned. Setting the first variable ‘all’ makes all system GPUs available inside the container.
On Jetson devices (which have only one integrated GPU), this variable is often not critical. - The second variable controls which GPU driver capabilities are available inside the container. By default, only a subset of capabilities is enabled for CUDA execution (utility, compute).
Setting all enables all NVIDIA features, including:- compute (CUDA calculations)
- video (video encoding/decoding acceleration)
- graphics (X11, OpenGL, Vulkan support)
- display (screen access outside the container)
- utility (NVIDIA tools like nvidia-smi)
Are These Variables Necessary? Not mandatory, but using them ensures full NVIDIA GPU support inside the container and reduces potential issues.
Understanding Cross-Platform Dockerfile & Docker Buildx:
Cross-Platform Dockerfile :
A cross-platform Dockerfile is designed to build container images for multiple CPU architectures (like amd64 for x86 PCs and arm64 for Jetson) from the same source and Dockerfile.
This is essential when your app needs to run on different hardware — for example, building one image that works on both cloud servers and edge devices.
The advantage is consistency: you write and maintain a single Dockerfile, and produce platform-specific images without duplicating code or logic.
It’s especially useful when targeting Jetson (ARM64) from a PC (AMD64), or when publishing images to Docker Hub or AWS ECR for different devices.
Docker Buildx:
Docker Buildx is a powerful CLI plugin that extends the standard docker build command to support multi-platform builds, cross-compilation, and advanced caching.
It allows you to build images for architectures you’re not running on (e.g., build for arm64 while on an amd64 machine) using QEMU emulation under the hood. You can also push multiple architecture images as a single multi-arch manifest, making it seamless for users to pull the correct version for their system.
In cross-platform development, buildx is the standard way to ensure your container works everywhere, from Jetson to AWS to desktop PCs.
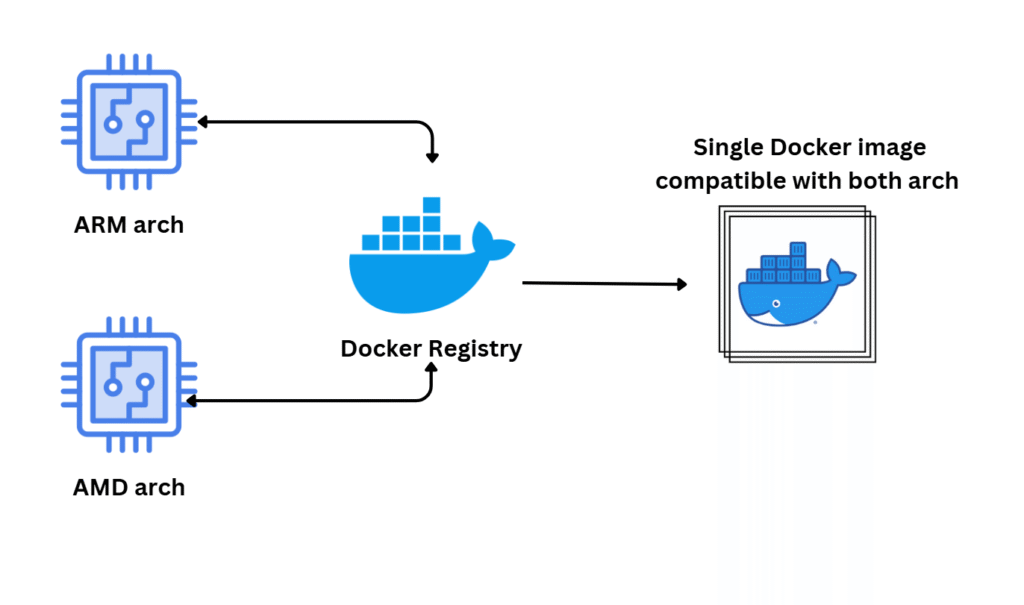
How Docker Buildx Saves Cross-Platform Images?
When you use docker buildx build to build for multiple platforms (like linux/amd64 and linux/arm64) and you push the image to a registry (like Docker Hub or AWS ECR), buildx creates a multi-architecture manifest — a single image reference that includes multiple platform-specific layers (“nodes” as you called them).
For example:
$ docker buildx build --platform linux/amd64,linux/arm64 -t myuser/myapp:latest --push .This command builds two images (one for AMD64, one for ARM64), packages them under one tag (myuser/myapp:latest) and pushes them to the registry as a multi-arch manifest.
Source: Multi-Platform Docker Builds
When someone pulls the multi-arch image:
$ docker pull myuser/myapp:latestDocker automatically detects the current platform (e.g., amd64 or arm64) and pulls only the relevant version of the image.
You do not need to manually specify the platform when pulling — unless you want to pull for a different architecture than your current system.
What is QEMU and Why Use It?
QEMU (Quick EMUlator) is an open-source virtualization tool that allows you to emulate one CPU architecture on another — for example, running arm64 code on an amd64 (x86) machine.
In the context of Docker and cross-platform builds, QEMU is essential because it lets you build and even run ARM64 containers on an x86 PC, without needing ARM hardware like a Jetson.
This is incredibly useful for testing, CI/CD, or preparing Docker images for devices you don’t have locally. When used with Docker Buildx, QEMU enables seamless cross-compilation and testing for multiple platforms from a single development environment.
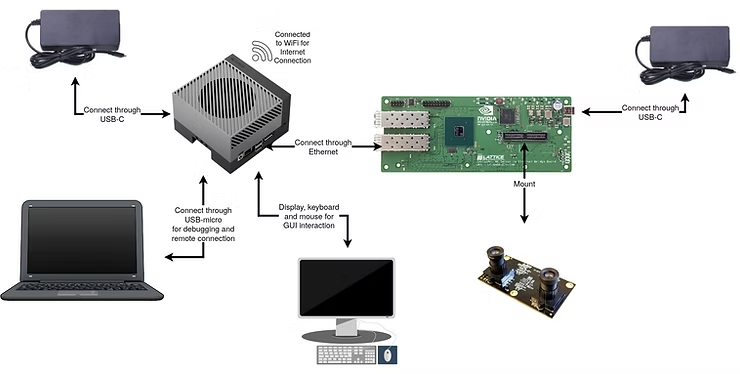
The Ways to Access Jetson from Your PC — and the Easiest One:
When setting up your Jetson Orin, you can connect it like a regular computer: plug in a network cable, HDMI cable to a monitor, a USB keyboard, and a mouse. This allows you to interact with the Jetson directly using its GUI.
However, if you prefer to control Jetson remotely from your PC, there are a few common methods:
- SSH over local network (Jetson and PC on the same router)
- SSH via USB virtual Ethernet (for dev kits that support it)
- Remote desktop (VNC, RDP – for GUI)
- Serial console access (for recovery/debugging)
- Wi-Fi direct (hotspot mode)
Source: Getting Started with the NVIDIA Jetson
💡 The easiest and fastest method that I found for development is to connect a network cable directly between your PC and the Jetson, set static IPs on both sides (or let Jetson get an IP via DHCP if available), and then SSH into it from your terminal:
$ ssh user@<jetson-ip>This allows full remote access to Jetson’s shell and tools — perfect for headless development and automation.
* You can get the IP address of the Jetson by connecting a keyboard, mouse, and monitor to it, plugging in a network cable, logging in, opening a terminal, and typing:
$ ifconfig
# or, if ifconfig is not installed, use:
$ ip a
# or
$ hostname -I
How to Share Internet from Your PC to Jetson Orin (via Ethernet)?
So if your Jetson Orin doesn’t have direct internet access (e.g., no USB network, Wi-Fi, or router nearby), you can share your PC’s internet connection with it by connecting an Ethernet cable directly between your PC and the Jetson.
Here’s how to do it on a PC running Ubuntu:
- Connect the Ethernet cable from your PC to the Jetson Orin.
- On your PC, open Settings → Network.
- Under the Wired section, you might see “Cable unplugged” (before Jetson boots).
- Click the gear icon next to the wired connection.
- Go to the IPv4 tab (or IPv6 if you’re using IPv6).
- Set IPv4 Method to: Shared to other computers.
- Click Apply and reconnect the cable or reboot Jetson if needed.
Now, your Jetson will receive internet access through your PC’s connection (via NAT). This is ideal for headless setups, package installation, or remote SSH access, without needing a router.
* You can also connect an Ethernet cable from the wall directly to the Jetson Orin, allowing it to access the internet through your home or office network.
Summary:
Key Concepts for Working with NVIDIA Jetson, CUDA, and Cross-Platform Containers
This guide explores essential topics for developers and DevOps engineers working with NVIDIA Jetson hardware, focusing especially on the Jetson Orin platform.
We begin by understanding the core difference between AMD64 (x86) and ARM64 (used by Jetson) architectures, which is crucial when building software across different devices.
We introduced JetPack, NVIDIA’s SDK for Jetson, which includes drivers, CUDA, TensorRT, and more, enabling AI and GPU-accelerated workloads on edge devices.
We reviewed the advantages of using Jetson in industry, particularly for real-time AI at the edge in robotics, smart cities, and autonomous vehicles.
The article also clarified the role of NVIDIA drivers and the CUDA toolkit, and how tools like nvidia-smi and nvcc help verify installation and identify compatible CUDA versions.
We covered the NVIDIA container runtime, which allows GPU access in Docker containers, and explained Dockerfile cross-platform builds with Buildx, enabling the same image to target both AMD64 and ARM64.
QEMU was introduced as a key tool to emulate ARM64 on x86 systems, useful for cross-platform development and CI.
For working with Jetson, we outlined ways to access it from a PC, with SSH over direct Ethernet being the easiest method, and showed how to share internet from a PC to Jetson.
Finally, we explained why migrating workloads to the Cloud offers flexibility, scalability, and removes dependence on local hardware, which can introduce its own limitations.
I hope you enjoyed the article and learned something new from it 🙂.
Curious how to actually build and deploy Jetson workloads and especially in the cloud? Part 2 will walk you through it step by step.


