
One of the cornerstones of successful DevOps implementation is the automation of development and deployment processes, and Jenkins has emerged as a versatile tool to fulfill this purpose. However, as project complexity grows, so does the demand for scalable infrastructure.
This is where VMware vSphere, a leading virtualization platform, provides the foundation for a dynamic and flexible environment. In this article, we will delve into the process of setting up a vSphere virtual machine (VM) as a Jenkins agent, illuminating the path for enhanced scalability and streamlined CI/CD pipelines.
This article is tailored for software engineers, DevOps practitioners, and IT administrators who are seeking to integrate VMware Vpshere into their Jenkins CI/CD workflows. The conventional approach of using dedicated physical machines for Jenkins agents can lead to resource inefficiency, scalability constraints, and increased operational overhead. Other use cases are on-premises environments cut off from the cloud. This is precisely where the integration of VMware vSphere and Jenkins becomes pivotal.
The problem at hand is threefold:
- Scalability: As development teams grow and project complexity escalates, the requirement for additional build and test resources surges. Traditional hardware-based Jenkins agents might struggle to meet this demand efficiently. Virtualization platforms like vSphere offer a solution by enabling the provisioning of VMs on-demand, scaling resources based on workload requirements.
- Resource Optimization: Dedicated physical machines for Jenkins agents often remain underutilized during non-peak periods, leading to the wastage of valuable computing resources. Conversely, vSphere’s virtualization technology allows for resource pooling and dynamic allocation, maximizing utilization and reducing costs.
- Dependency and Package Discrepancies: A lesser-addressed conundrum arises from inconsistent environments across the development and deployment spectrum. As projects traverse diverse stages – from development and testing to staging and production – discrepancies in dependencies and packages can rear their heads, causing inconsistencies and glitches. The antidote? Pre-configured VM images in vSphere that encapsulate the required environment configurations. This approach ensures uniformity across different phases of the development lifecycle, expediting troubleshooting and enhancing stability.
By leveraging vSphere’s virtualization capabilities to create Jenkins agents, organizations can address these challenges head-on. This article will guide readers through the step-by-step process of configuring a vSphere VM as a Jenkins agent, demonstrating how to harness the power of virtualization for an agile and responsive CI/CD infrastructure. Whether you’re an IT professional looking to optimize resource utilization or a developer aiming to accelerate software delivery, this guide will equip you with the knowledge needed to establish a robust and adaptable Jenkins agent framework using VMware vSphere.
- Notes
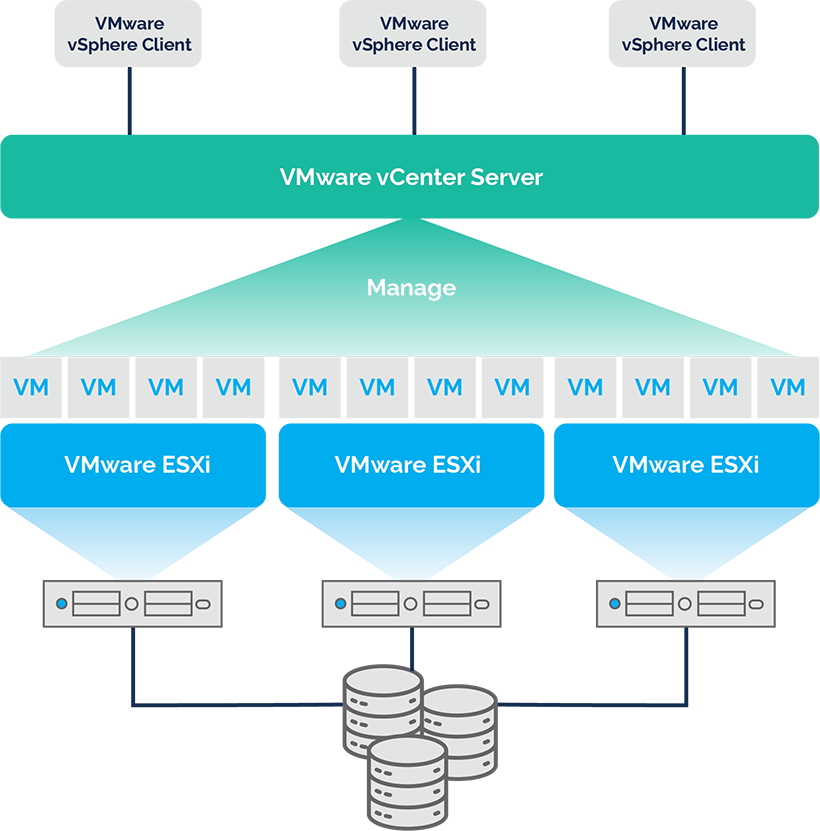
- vSphere is VMware’s virtualization platform
- vCenter and ESXi are components that work within that platform to help organizations achieve their mission-critical goals
- version used 6.7
- this was done on a on-prem architecture set up by client’s IT
Create VM
1 ) create a vm using an ubuntu 20 server os
- power on the vm and connect to the vm and follow the os installation
- create the initial ubuntu user
- once the installation has finished select REBOOT NOW(VM) , disconnect the CD/DVD drive (Vsphere center), and press ENTER (VM)
Setting up agent
#connect to vm and sign in as ubuntu
ssh ubuntu@<vm-ip>

#install openjdk check which verion your jenkins server uses
#the latest version (so far)  2.361.2 uses jdk 11
sudo apt update && sudo apt install openjdk-11-jdk

#create the jenkins user and home dir
sudo useradd -m -d /var/lib/jenkins/ jenkins

#create an ssh key
ssh-keygen -b 2048 -t rsa

#create .ssh dir
mkdir /var/lib/jenkins/.ssh

#copy content of id_rsa.pub to authorized_keys

#create jenkins credential user with ssh key using the private key
Configure vsphere plugin
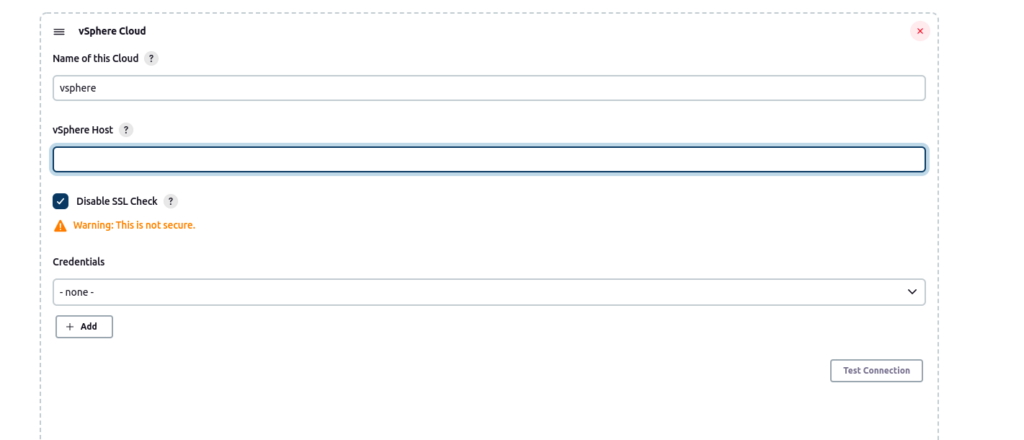
now we will configure the jenkins vsphere plugin to use the vm as master image to clone new vms to run jobs on
enter host address and credentials saved as user with password
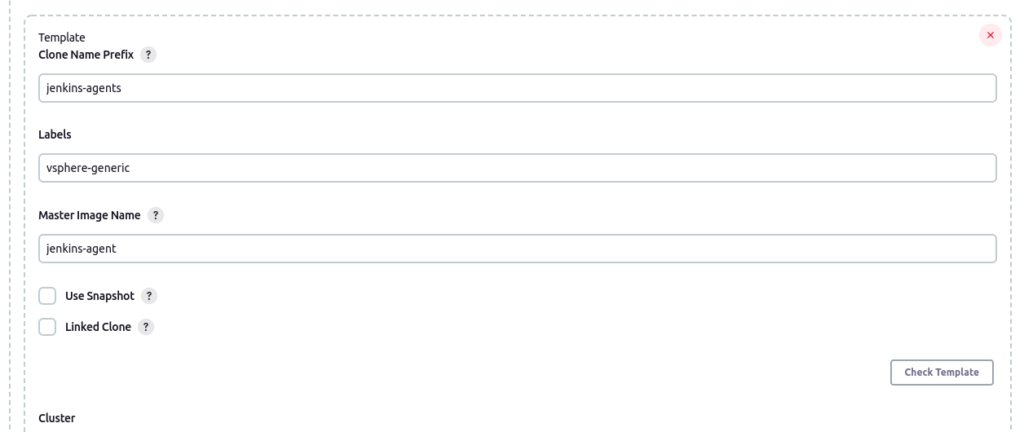
add a template and use the name you gave your jenkins agent vm in the master image Name
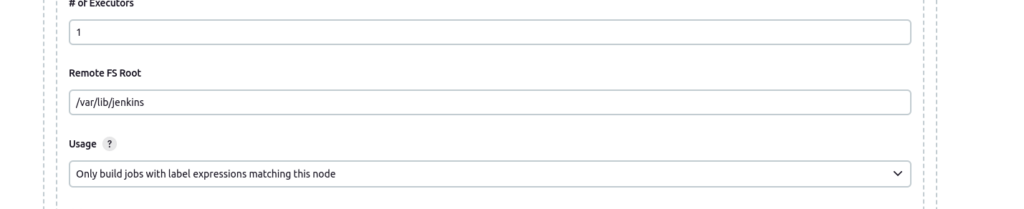
set the remote fs root as the jenkins user’s home
configure the ssh connection
the host will be the ip of the jenkins agent vm and the credentials will be the user with ssh key credentials created using the generated ssh key

Example
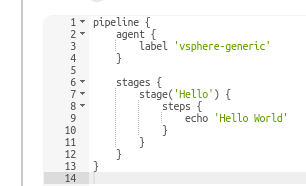
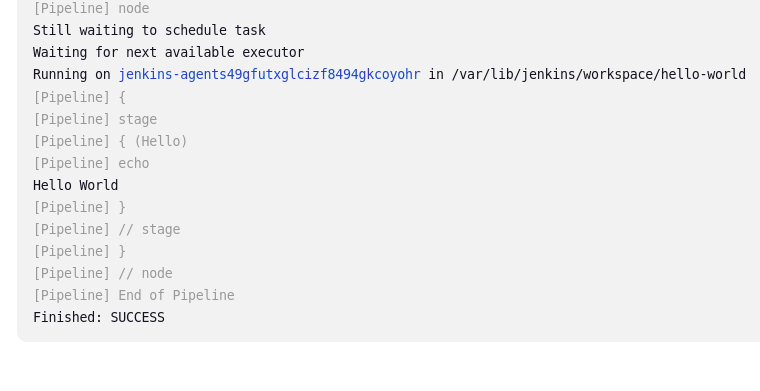
Here is a test pipeline to create a new agent that will be a clone of the original Jenkins agent VM
As we wrap up our exploration of setting up vSphere virtual machines as Jenkins agents, we arrive at a pivotal junction of DevOps success. By leveraging Jenkins’ automation with vSphere’s virtualization, you’ve acquired the tools to amplify your development endeavors. This collaboration empowers your teams to overcome limits, make the most of resources, and tame the chaos of different environments. With the insights you’ve gained, you’re now equipped with the knowledge to allow software deployment to happen effortlessly. As technology keeps evolving, remember that combining the right tools always points us toward uncharted innovations.